
Welcome to Germination Station
 Years ago I visited the Dry Creek Herb Farm in Auburn, California. It was around Thanksgiving. It was cold and a bit rainy. Most of the herbs were out of season, many were dead or dying, but it was quite interesting anyway. They had a gift shop there and I bought a bunch of books, some trinkets and I picked up a “Kidzerbs” package which (as described on the package) is “a Kid’s Garden Kit for Growing Medicinal Plants” created by Sena Cech, a creative herbalist. I didn’t buy it as a present for any child, though. I bought it for myself and I was quite excited.
When I got home, I opened the box and thoroughly studied the contents and instructions.
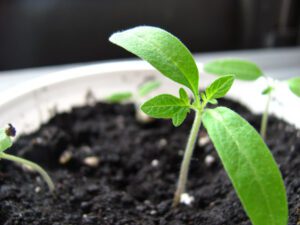
My Herb Seed Germination package contained seeds of basil, borage, calendula, california poppy, catnip, chamomile, clary sage, fennel, feverfew, flax, johnny jump-ups, lemon balm and love-in-the-mist. I planted them all in individual small plastic pots. I followed the instructions explicitly and within days my first few herbs popped their tiny little heads out from the dirt. It was amazing to watch them germinate!
Success!
…I thought, and excitedly showed everyone who came by my little indoor herb “garden”. Well, much to my dismay, as the plants grew taller, they started falling over, withering and finally died. But, still… it was great fun!
The reason I mention this is because I then ordered herb seeds online and, lo and behold, the company I finally chose to purchase my seeds from were the very same people that created “Kidzerbs”! I found this out after I received their catalog with my order. Their site is very informative and the family that runs the company seem like very special people. (Btw, that’s not an affiliate link.)
Okay, starting herb seed germination indoors is easy. It doesn’t even matter if you are a complete beginner. I believe that it’s the best way to start your garden plants. Purchasing them as ready-made transplants denies you of a great experience and lots of fun. You also add weeks to your gardening season because you don’t have to wait for warmer weather to start or, if you’re an indoor gardener, no worry about cooler weather on the horizon.
Gather supplies for your herb seed germination station first. You will need:
- seeds,
- containers,
- seed-starter mix,
- some milled sphagnum moss,
- water,
- a spray bottle, and
- plastic wrap or aluminum foil
Choose your seeds carefully. If you plan to transfer them outdoors eventually, you’ll need to find herbs that can thrive in your area’s climate and water availability. If you plan on keeping them indoors, choose herbs that have the best chance of tolerating an indoor environment.
Containers can be purchased or you can reuse old ones. Any container 2 to 3 inches deep will do to start. Make sure they have drainage holes and protect from plant disease by cleaning them thoroughly in hot, soapy water and rinsing with diluted distilled white vinegar (or bleach).
7 Steps for herb seed germination
- You can purchase bags of seed-starter mix at your garden center or mix your own with equal parts of perlite, vermiculite and peat (also available at your garden center). You should neutralize the acidity of the peat by mixing each gallon of mix with 1/4 teaspoon of lime.
- Moisten the soil mixture prior to adding your seeds. Once you’re ready, follow the directions on your seed package or information sheet for the individual seeds. You might need to bury them in a shallow hole, place them on top of the soil and pat them in or just drop them on top of the soil. Be sure to try your best to space them as evenly as possible. This can be very difficult with some seeds that are nearly microscopic!
- It’s an excellent idea to lightly sprinkle milled sphagnum moss (a natural fungicide) over everything to protect against damping-off (a fungal disease that rots seeds and seedlings). However, if the seeds you are planting are supposed to be on top, sprinkle the moss first and then drop them on top.
- Cover the containers with plastic wrap or “tent” them with aluminum foil. Keep them in a warm area until they sprout — on top of the refrigerator works great. Be sure to keep them moist by misting or by setting the containers in water.
- At the first sign of sprouting, uncover them and move to a sunny location in a window or a greenhouse or under a fluorescent light. Regular flourescent lights, like a shop light with two bulbs, works well. Your seedlings need 12 to 16 hours per day of light so a flourescent light can insure they get the high intensity light they need. If you decide to use the light, hang it above the plants only two inches above and move it up as they grow.
- Feed your seedlings with a very weak fertilizer solution when they grow their first set of real leaves. It is best to place them in the watered down fertilizer and let them soak it up into the soil and roots. Herbs prefer not to be sprayed with water at this point.
- When your herbs start to crowd each other, very carefully transplant them into larger containers, this time adding compost. A small fan on low not directly pointed at them will give the effect of a natural breeze and will help your herbs develop a stockier stem. If you plan to eventually plant your herbs outdoors, get them used to the idea first by placing them outside on nice days for short periods of time for about a week.
Well, there you grow!
More herb gardening information on this website:
Starting Outdoors
Container Gardening (Indoors and Out)
Hydroponic Herb Gardens